Welcome back to part 3 of our series on getting started in ROS. Today we will setup the robot that we will be using. For beginners I reccomend a 2 motor platform such as a electric wheelchair(That is what I am using) or a Roomba base. If you want to shell out the cash and get a premade kit, just get a turtlebot. They are pricey but they work out of the box with as little work on your part as possible. If you choose the turtlebot you have all the code done for you. It is preferable that the platform is large enough to hold a laptop and, if you choose, a Microsoft Kinect. We will use the Kinect later for SLAM(Simultaneous Localization And Mapping). My setup uses an electric wheelchair with custom control circuitry, some scrap wood, and a nightstand bolted onto the chair as a platform. I admit that is crude but it works for me.
My base started out like this:
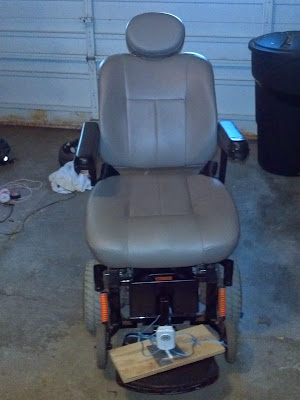 (Sorry for the bad photo)
After a lot of modifying(See here) I got to something that was at least usable.

I have a power inverter for the laptop and Kinect and 12V, 5V, and 24V for all of my low voltage needs. Due to my blowing one of the fuses by reversing polarity, I am currently using just an extension cord for power.
To start hack your motors.
First figure out how it gets powered. In my case the motors got 24V.
Then hack the safety measures(if any). On my robot I have brakes on the motors that will not disengage until they get 24V applied to them.
Once you've done that, figure out your batteries. The wheelchair I bought had dead batteries so I was able to choose what batteries I wanted. I settled on two 35AH 12V AGM batteries(Click links for definition of terms). The frame had Powerpole connectors on all of the electrical connections so I kept those and just soldered jumpers to them. The batteries are wired in series to produce 24V and each battery has a circuit breaker on the positive lead. A 20 Amp DPDT Switch disconnects both batteries from the circuit and I use a terminal block to route all of the connections.
Now enough of my bragging and showing off, let's get back to your robot. It really doesn't matter how you wire up your 'bot as long as your use the Sabertooth to run the motors. Oh yeah, I almost forgot. No really, I'm not kidding...
A word about encoders: Encoders are the heart of your robot. Without them you cannot drive your robot with ROS... I reccomend starting simple and working your way up. I have photointerrupters, which are as simple as can be. It is, in a nutshell, a light on one side and a light sensor on the other that senses when a toothed disc turns. It produces one pulse for every tooth on the wheel regardless of direction. It requires more coding than some other methods such as SPI drivers because you need to know the direction of rotation of the motors. I pulled my encoders from an old HP printer and used laminated paper wheels that I printed off the internet. I then attached the wheels directly to the wheels and made a wood boom to hold the encoders on the edge of the laminated wheel. You can just barely see them on both sides of the robot in the image above.
Enough of that, configure your Sabertooth with the tool I mentioned in a previous post to use microcontroller simple serial mode.
Now it's time to wire it all up! Connect the S1 port on the Sabertooth to pin TX2 on the Arduino Mega and connect the signal pins of your photo-interrupters to pins D2 and D3 for the right and left wheels respectively.
Now your robot is ready to roll!
My base started out like this:

After a lot of modifying(See here) I got to something that was at least usable.

I have a power inverter for the laptop and Kinect and 12V, 5V, and 24V for all of my low voltage needs. Due to my blowing one of the fuses by reversing polarity, I am currently using just an extension cord for power.
To start hack your motors.
First figure out how it gets powered. In my case the motors got 24V.
Then hack the safety measures(if any). On my robot I have brakes on the motors that will not disengage until they get 24V applied to them.
Once you've done that, figure out your batteries. The wheelchair I bought had dead batteries so I was able to choose what batteries I wanted. I settled on two 35AH 12V AGM batteries(Click links for definition of terms). The frame had Powerpole connectors on all of the electrical connections so I kept those and just soldered jumpers to them. The batteries are wired in series to produce 24V and each battery has a circuit breaker on the positive lead. A 20 Amp DPDT Switch disconnects both batteries from the circuit and I use a terminal block to route all of the connections.
Now enough of my bragging and showing off, let's get back to your robot. It really doesn't matter how you wire up your 'bot as long as your use the Sabertooth to run the motors. Oh yeah, I almost forgot. No really, I'm not kidding...
A word about encoders: Encoders are the heart of your robot. Without them you cannot drive your robot with ROS... I reccomend starting simple and working your way up. I have photointerrupters, which are as simple as can be. It is, in a nutshell, a light on one side and a light sensor on the other that senses when a toothed disc turns. It produces one pulse for every tooth on the wheel regardless of direction. It requires more coding than some other methods such as SPI drivers because you need to know the direction of rotation of the motors. I pulled my encoders from an old HP printer and used laminated paper wheels that I printed off the internet. I then attached the wheels directly to the wheels and made a wood boom to hold the encoders on the edge of the laminated wheel. You can just barely see them on both sides of the robot in the image above.
Enough of that, configure your Sabertooth with the tool I mentioned in a previous post to use microcontroller simple serial mode.
Now it's time to wire it all up! Connect the S1 port on the Sabertooth to pin TX2 on the Arduino Mega and connect the signal pins of your photo-interrupters to pins D2 and D3 for the right and left wheels respectively.
Now your robot is ready to roll!
This is really interesting project. I want to implement something similar. Why is the project dead now? I did not see any updates after Oct 2015. Please put more tutorials on the progress of this project. More people will benefit out of this blog.
ReplyDeleteThanks
Thanks for your interest in this project! I tried to use this blog as a motivation for me to complete this project, but due to lack of knowledge, I was unable to move forward. I am considering moving forward on this project in the next week or two. I you would like to provide help on the software or hardware side, feel free to drop me a line.
DeleteI would like to let you know that I have reopened the project, and continue to blog on it now.
Delete